
Add Your QES Key in Prism and Let the Agent Work with Your E-Court
· Prism
Connect your E-Court to Prism so the agent can help with the cases, documents, and messages available in your cabinet. Add your qualified electronic signature (QES) key, select the context, and assign a defined task: a material review, chronology, or draft. In Prism, the connection leads into research and the team’s working project.
1. Add the key through the Prism form
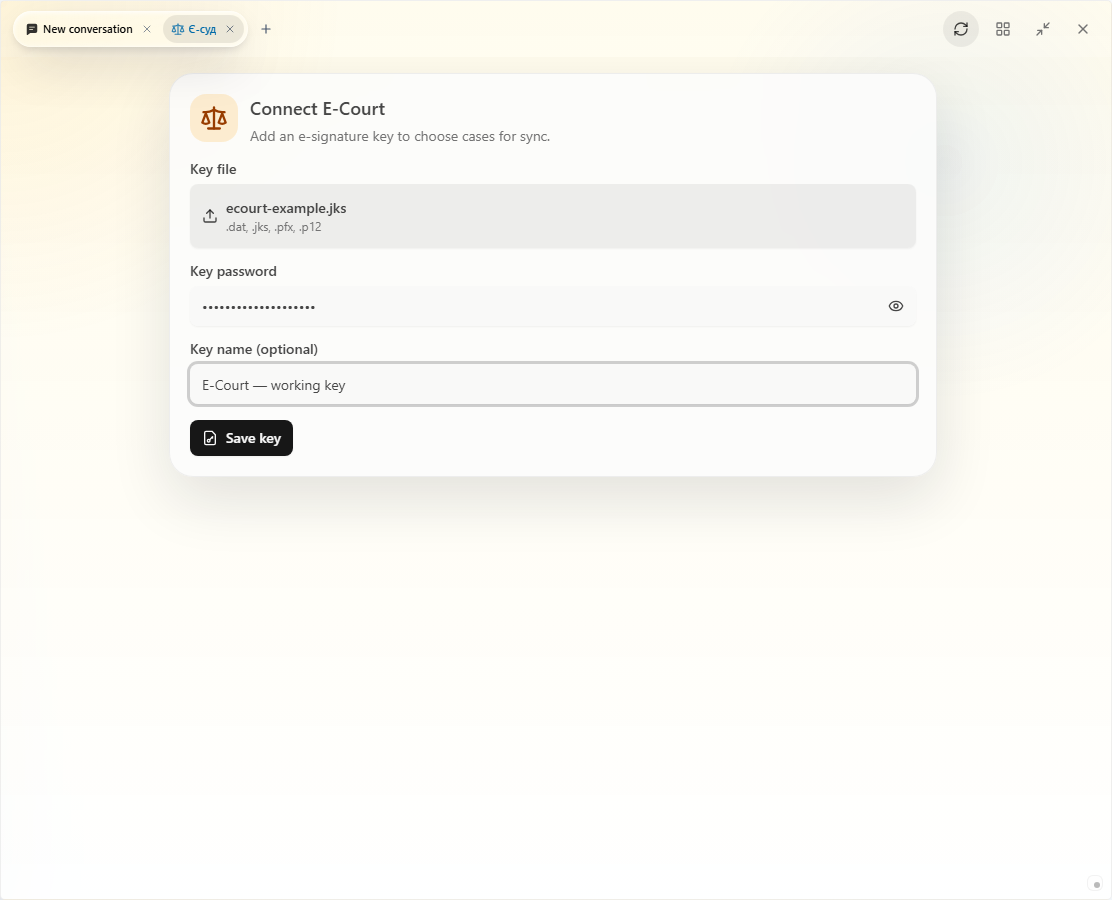
Open E-Court in the sidebar. The key form appears for the first connection. If a key is already saved, add another through the key picker or E-Court settings.
- Select your key file. The form accepts .dat, .jks, .pfx, and .p12.
- Enter the password in the key-password field.
- Optionally name it, for example “E-Court — working key”.
- Click “Save key” and inspect the result message.
Enter the file and password through the connection form. In the next agent request, identify the saved key and the required task.
2. Open the available cases
After the key is verified and saved, inspect the first synchronization’s state. Wait for available cases to appear and select those you will work with. In E-Court, choose the saved key and the appropriate available role.
Find the case by number. Open its proceeding and documents to define the first task’s scope. Before requesting analysis of a particular document, check that its text is available.
The agent works with material available through the connected key, selected role, and configured case collection.
3. Give the agent its first task
Use the connected key “E-Court — working key” and selected role. Show the available cases for our work. For each, give its number, title, material to review, and next action. Prepare a shortlist of documents to examine first.
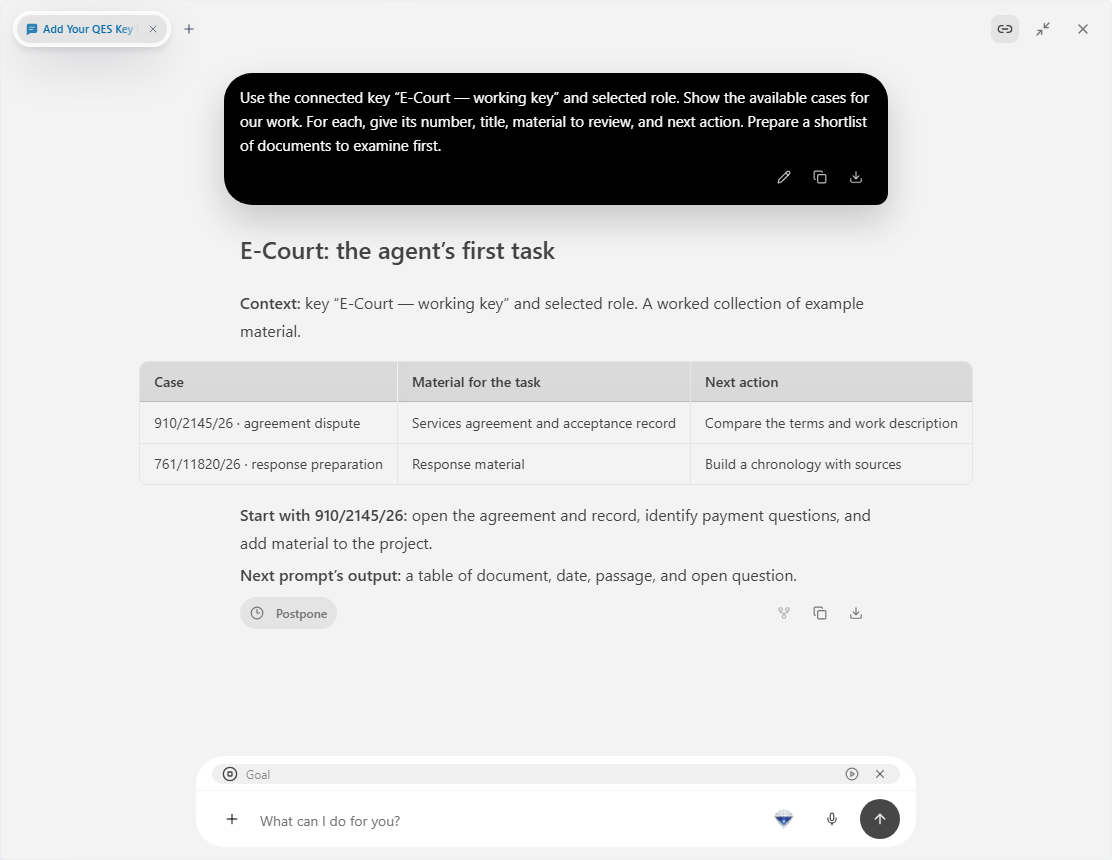
The screenshot’s example organizes two rows: an agreement dispute and response preparation. For your work, choose a row and continue: “Open this case’s documents, build a chronology, and identify the source for each event.”
| Required result | Next agent task |
|---|---|
| Case overview | Group material by document |
| Chronology | Provide date, event, and source |
| Argument review | Match the claim to document passages |
| Draft | Prepare an outline from the case material |
4. Continue in the project
Retain the table and material used in a Prism project. Add your agreement, brief, or client question and ask the agent to connect it to the case documents. Leave a colleague the required case number, sources, and next action.
Choose Prism to keep the complete sequence in one working context: E-Court connection, material analysis, files, and team tasks. Begin with Prism research and the workspace. Key and official-cabinet login guidance is available through the Electronic Court portal.